How to | Put Data in a Grid with the Front End
While you can programmatically create two-dimensional layouts, the Wolfram System front end provides convenient tools for creating and editing two-dimensional grids of data, in a way that is deeply integrated with typesetting and evaluation. This lets you enter data as you would in a spreadsheet, simplifying the cases when you need to manually enter data into the Wolfram Language.
This page requires that JavaScript be enabled in your browser.
Learn how »
One of the simplest ways to create a grid for data entry is to use the keyboard shortcuts for creating empty rows and columns.
For example, in an input cell, press ![]() to create a new column. The highlighted placeholder indicates that you can enter data into it:
to create a new column. The highlighted placeholder indicates that you can enter data into it:
Pressing ![]() creates a new row (
creates a new row (![]() on Mac OS X):
on Mac OS X):
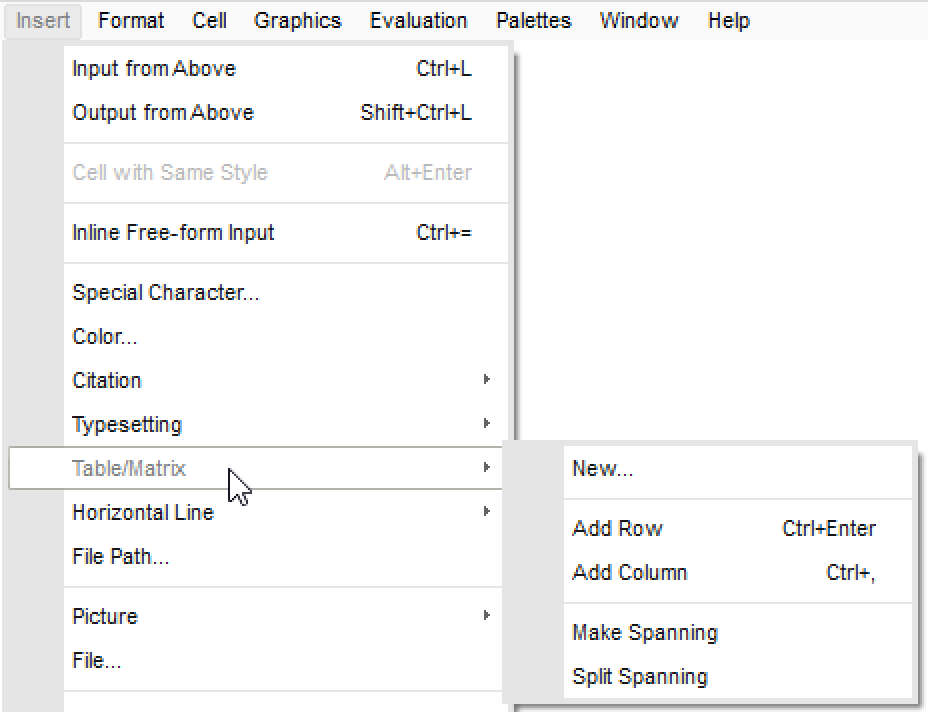
![]() is the keyboard shortcut for Insert ▶ Table/Matrix ▶ Add Column, while
is the keyboard shortcut for Insert ▶ Table/Matrix ▶ Add Column, while ![]() is the keyboard shortcut for Insert ▶ Table/Matrix ▶ Add Row:
is the keyboard shortcut for Insert ▶ Table/Matrix ▶ Add Row:

The grid here was created by typing a11, followed by ![]() twice, then
twice, then ![]() twice:
twice:
Using ![]() , the arrow keys, or your mouse, you can move from one placeholder to the next to quickly fill the grid with data. Each piece of data can be any expression, like numbers, strings, or other formatted expressions.
, the arrow keys, or your mouse, you can move from one placeholder to the next to quickly fill the grid with data. Each piece of data can be any expression, like numbers, strings, or other formatted expressions.
Once you have filled out the grid, you can cut, copy, and paste any subgrid by first dragging over several elements with your mouse to select them.
Here, the middle column was selected with the mouse and then copied using the contextual menu that appeared after right-clicking the selection:

Select the same number of rows and columns elsewhere in the grid and then paste using the same contextual menu. Here, the second column was pasted over the existing third column:
Since the copied selection contains the same number of rows, pasting it to the right of the original grid simply adds another column:
Select the new column and either cut or delete it to return to a three-column grid:

You can also paste outside the existing grid to create a new grid consisting of just the pasted elements. Here, the column cut in the previous step was pasted into a new cell below the existing one:
Evaluating a grid that has been entered will output a list of lists, which is also referred to as a matrix:
Entering data with this method can also be used to construct arguments for Wolfram Language functions that require matrices as input.
For example, Det gives the determinant of a square matrix:
Another convenient way to create an empty grid is with the Insert ▶ Table/Matrix ▶ New menu item.
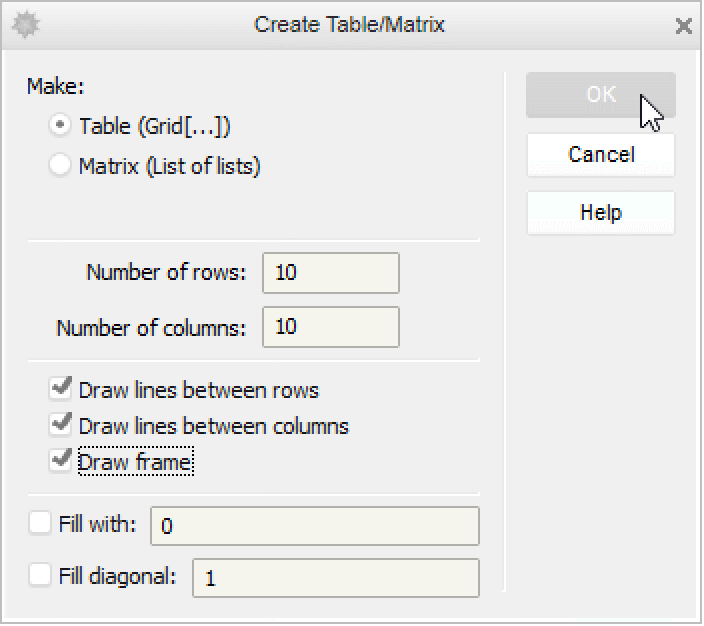
In the dialog that appears, enter the dimensions you want, the setting for frames, and click OK.
Here, a 10×10 grid with all frame lines turned on was created:

You can also create regions in a grid that span multiple rows and columns.
To turn the first row into a single element that spans the width of the grid, select the whole first row with your mouse and then select the Insert ▶ Table/Matrix ▶ Make Spanning menu item:
Spanning works on subgrids as well, not just individual rows and columns. Here, a 4×4 section of the grid was effectively turned into a single element:
You can undo this action by selecting the spanned region and then selecting Insert ▶ Table/Matrix ▶ Split Spanning.