How to | Create and Work with Cells
The Wolfram System notebooks consist of sequences of cells, which can be nested. The hierarchy of cells serves as a structure for organizing information in a notebook as well as specifying its overall look.
Selected examples from the video:
When you first start the Wolfram System, it displays an empty notebook with a blinking cursor. You can start typing right away. Notice the bracket that appears along the right side of the notebook in line with what you just typed. This bracket shows the extent of the cell:
Cells are the basic structures of a Wolfram System notebook. They can contain commands, scientific text, graphics, typeset mathematical expressions, dynamic interactive elements, or other cells.
By default, new cells are in the Input cell style. The contents of Input cells are interpreted as commands that can be evaluated using ![]() . The result is displayed in a separate Output cell following the Input cell, as indicated by the labels on the left after evaluating:
. The result is displayed in a separate Output cell following the Input cell, as indicated by the labels on the left after evaluating:
1 + 2To change the insertion point, move the mouse pointer in the notebook window until it becomes a horizontal I-beam and click. Here, the horizontal I-beam is displayed:
To create a new cell, start typing when you see this horizontal cell insertion bar:
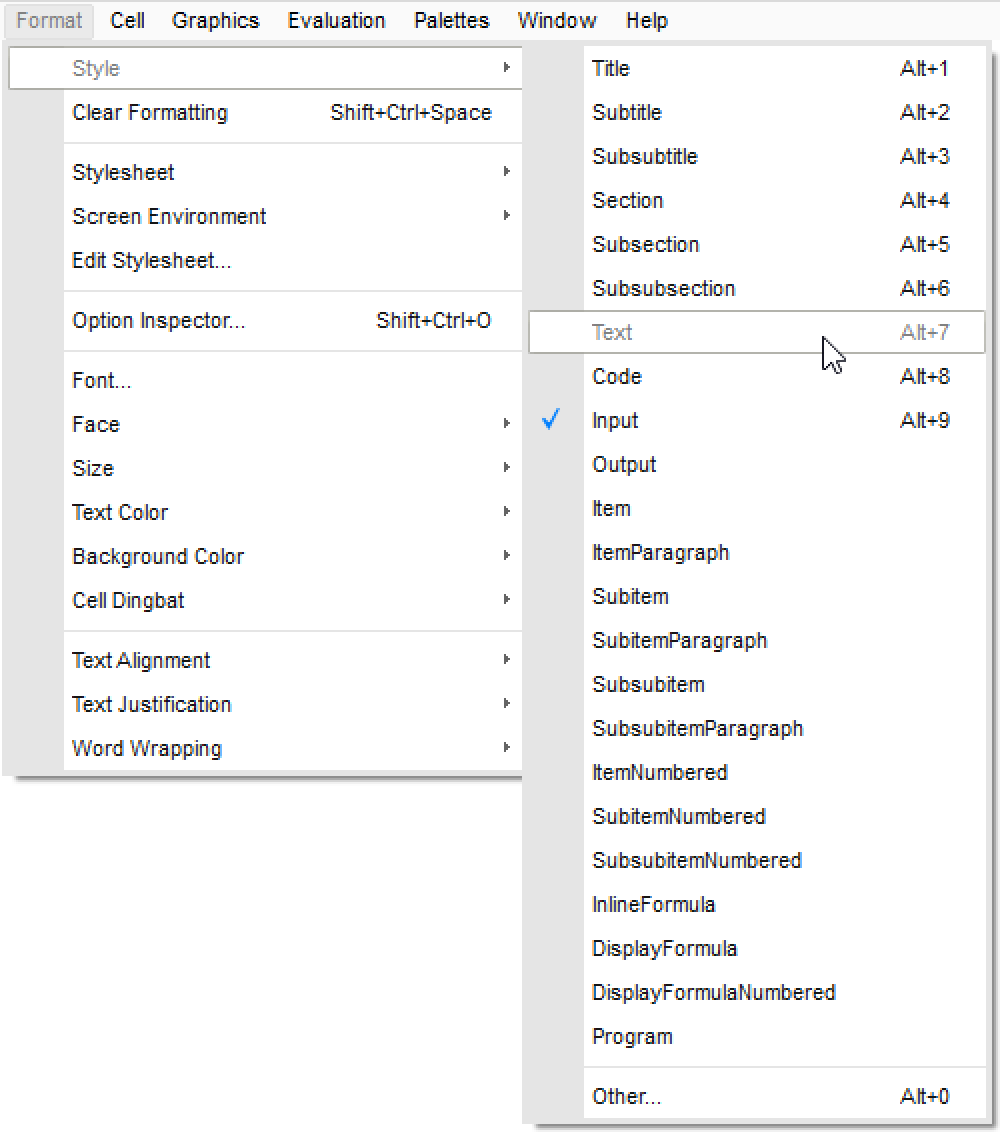
[image]The default style of cells is Input; instead, you can create a cell containing text to add comments or descriptions of your programs. With an insertion point indicated by the horizontal cell insertion bar, create a new cell in the Text cell style from the Format ▶ Style menu, or use the keyboard shortcut indicated in the menu.
You can change the style of a cell by selecting its cell bracket on the right and then choosing a different cell style from the Format ▶ Style menu. The Input cell here is changed to the Section cell style:

You can also change the appearance of a cell, such as its color, by using the Format menu. Here, Format ▶ Background Color is used to change the background color of the selected cell to light blue:

Other information that also can be edited from the Format menu includes font color, size, and font.
Some cells have automatic hierarchical grouping behavior. For example, Section cells group all Subsection and Text cells. The layering of brackets on the right side of the notebook indicates grouping. Grouping allows you to organize the contents of a notebook.
You can close a group of cells by double-clicking the outer cell bracket that encloses the group. Here, the cell bracket of a Subsection cell group was double-clicked and so is closed:
The closing behavior of input/output groups is slightly different. In addition to closing such a group by double-clicking its cell bracket, you can do so by double-clicking the cell bracket of just the Input cell:
Double-clicking the cell bracket of just the Output cell in an input/output group will close the group around that Output cell. This is a convenient way to display the result of an evaluation without displaying the command that produced it, while keeping access to the input for later changes.
Here, the bracket of the cell containing the results of 3+4 was double-clicked:
You can identify a closed cell group by the triangular flags that appear on its bracket. The direction of the triangular flags indicates the direction of hidden content.