How to | Work with Initialization Cells
Using initialization cells, you can specify that particular input cells of a notebook should be evaluated first. This ensures that your code is evaluated in the correct order, such as defining functions before evaluating cells that use those definitions.
Selected examples from the video:
This command requires the custom-defined function polynomialFunction to work properly. You can see that evaluating it without the function being defined produces an empty plot:
Plot[Evaluate[Table[polynomialFunction[n], {n, 1, 5}]], {x, -2, 2}]While it may seem obvious that polynomialFunction needs to be defined before using it to create a plot, it is easy to forget to define required inputs, especially when they are located in other parts of your notebook or are part of larger notebooks with many definitions.
The Wolfram System lets you create initialization cells to solve this problem. Initialization cells will automatically evaluate before other cells in your notebook.
To create an initialization cell, first select the bracket of the cell:

Now choose Cell ▶ Cell Properties ▶ Initialization Cell:
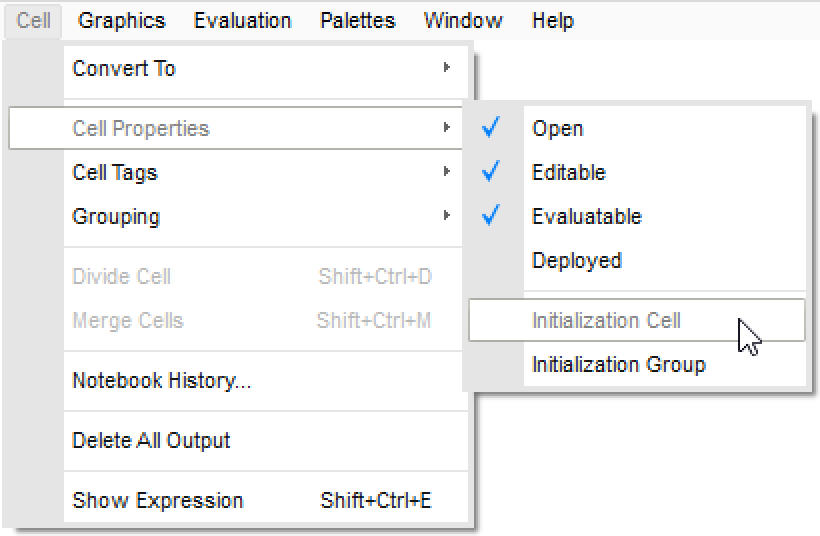
The top of the cell bracket will now have a short vertical tick mark:

After saving and reopening your notebook, when you evaluate any cell in the notebook you will be asked if you want to automatically evaluate all the initialization cells in the notebook:

You can also create initialization cells by using the Code cell style. Code style cells are initialization cells by default.
Select the bracket of the cell you want to make Code and select Format ▶ Style ▶ Code:

The cell will now have a light gray background in addition to the short vertical tick mark at the top of its bracket:
