Using Testing Notebooks
Using Testing Notebooks
| Getting Started | Generating .wlt Files |
| Running Tests with the Notebook Interface | Assigning TestIDs |
| Working with Test Results | Notebook Conversion |
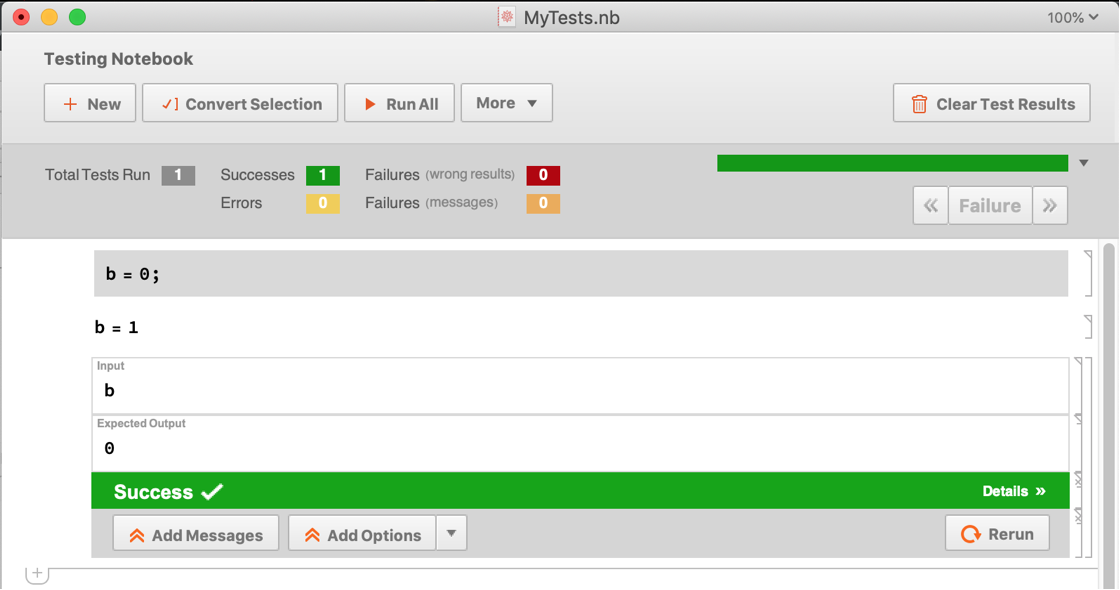
In the Mathematica menus, click File ▶ New ▶ Programmatic Notebook ▶ Testing Notebook. It will bring up a testing notebook. (The notebook depicted here has also been saved using File ▶ Save As... with name MyTests.)


In the "Input" cell, type or paste the input for your test. In the "Expected Output" cell, type or paste what the output should be.

If messages are expected to be generated upon running the tests, add them using the Add Messages button. You can also add options to individual tests, such as MemoryConstraint, SameTest, TestID and TimeConstraint, using the drop-down to the right of the Add Options button.

To define values or run setup code outside of a test, insert an "Environ" cell by clicking More ▶ Insert Environ Cell before the test.
This creates an "Environ" cell with a light-gray background. Expressions in an "Environ" cell are evaluated during the test run, while content in a regular input cell is ignored.

Clicking the Run button will evaluate all tests in the testing notebook. The test results are inserted into the individual tests as they are evaluated, and upon completion of the test run, a summary of the test report is inserted at the top of the notebook. The following notebook displays the four possible test outcomes: Success, Failure, Message Failure and Error. The Clear Test Results button may be used to clear test results from the notebook.

The test report summary details the total number of tests run as well as the number of successes, errors, failures due to wrong results and failures due to messages. Additionally, a summary bar depicts the test results and has two modes for ordering the test results: by status and by sequence. When the total number of tests in a testing notebook is 50 or fewer, every individual tab in the summary bar links to its appropriate test. In the lower-right corner, there are two buttons that find the previous and next failed tests relative to the cursor position.
Following is a success. If you wished to modify this particular test and see the outcome, you would use the Rerun button.

Following is a failure due to a wrong result. This happens when the actual output is different from the expected output. If the actual output is the correct result, the expected output can be changed to it by clicking the Replace Output button. Subsequently, the test can be rerun by using the Rerun button.

Following is a message failure. Here, there is an actual message. The test fails since there is no "Expected Messages" cell with that message. The Replace Message List button may be used to insert an "Expected Messages" cell with content as in the "Actual Messages" cell. The test may then be rerun using the Rerun button.

Following is a test error. Fix the right-hand side of the option in the "Test Options" cell and use the Rerun button.

Click More ▶ Save As .wlt to save the tests in the notebook to a .wlt file. A file save chooser will be generated, allowing you to choose the file name and save it to a directory.

Here, the file name was chosen to be MyTests2 and it was saved to the directory C:\\Users\\xyz\\Desktop. This makes a report for that file.
tr = TestReport["~/Desktop/MyTests.wlt"]tr["Properties"]tr["Results"]This shows the expected output and actual output for the first failed test. For this test file, there is just one failed test.
ft = tr["ResultsByOutcome"][["Failure", 1]]ft /@ {"ExpectedOutput", "ActualOutput"}
Here is a test cell group with a TestID assigned.

